
Home Page
1967 Mustang Convertible
1970 Cougar XR7 Convertible
Current and Past T'birds
Bob's Bigboy
Sand Blasting Cabinet
S-B-C Page 2
In Progress 3
In Progress 2
In Progress 1
|
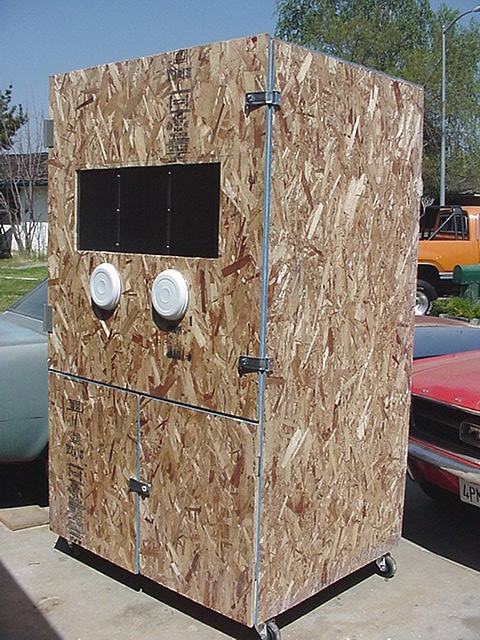
PROJECT: Sand Blasting Cabinet
This cabinet cost me less than $ 200, and some time!
After looking at several sand blasting cabinets on the market, I decided to build my own. The new cabinets were either to small for my needs, or to expensive for my budget. I figured I could build a SBC that will fit my needs and pocket book, and still be expandable in the future if needed.
A friend had built one similar to mine about a year a go. He used scrap materials he had laying around the shop that saved him mucho denerio. Since I wasn't so fortunate to have many scraps, most materials used on my SBC are new. I've included a material & price list at the end for those who might be interested in building there own cabinet.
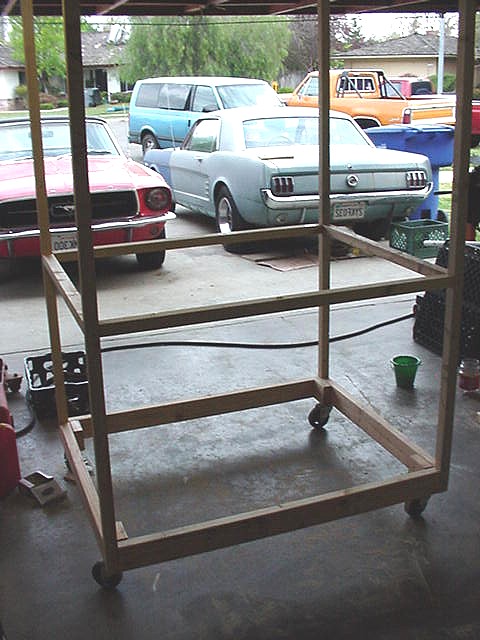
The Frame
The cabinet is 48" wide, 39" deep and 78" tall (50" high work space, and 28" below in storage/return space).
I started off building a frame out of 2x2's and 2x4's. I also added 5" steel swivel casters with hard rubber wheels. I wanted to keep the height down under 7'feet so I can roll it under the eave of my house when not in use.
|
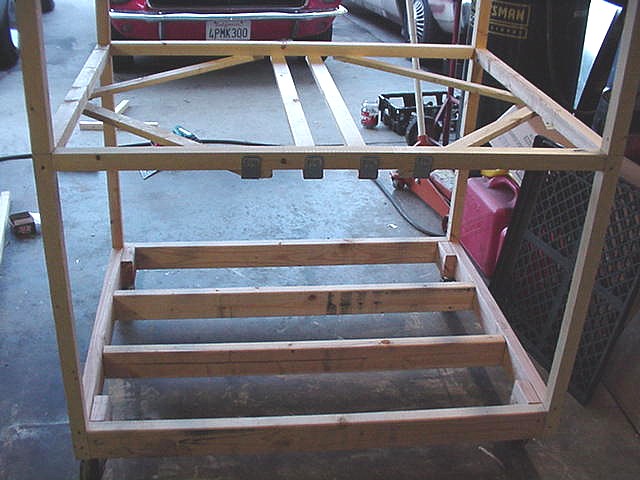
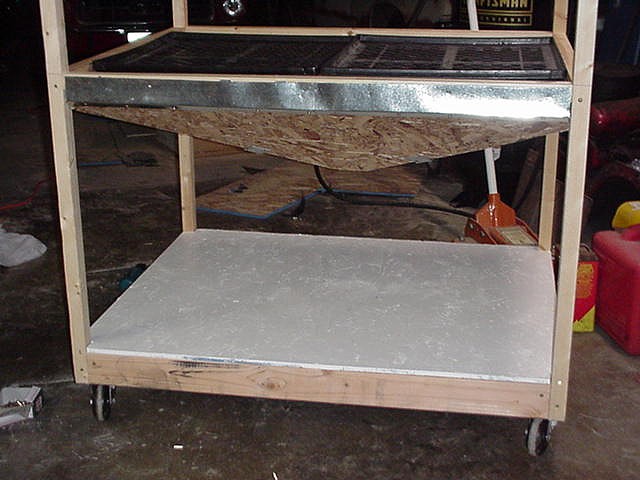
Floor & Shelfing
When it came time to build the shelf, I wanted something that would allow media to fall through to a return bucket below. I used 1x2's to form a simple shelf frame, and will use a couple of bread/pastry trays that wholesalers use.
I used 2x4's for the lower floor since I wanted it to be strong enough to store three or four 5gal. buckets of different types of media, plus other supplies & equipment.
|
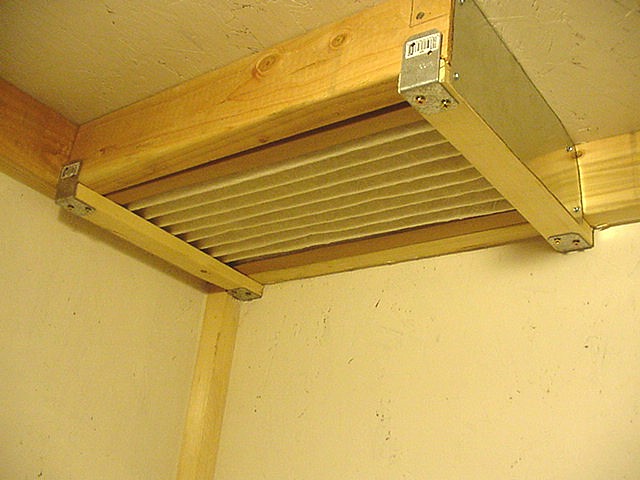
Exhaust System
Honestly, this is a primitive set up, and will be changed out in the future. I intended on using a fan & motor off of a commercial ice box, which would of been strong enough for four SBC's this size. Unfortunately the deal I had made on one, fell through at the last moment.
So for now, I have to resort to my good old shop vac and a furnace filter to keep the dust down inside. I will be running a 1" PVC pipe down the back side to attach to the shop vac.
|
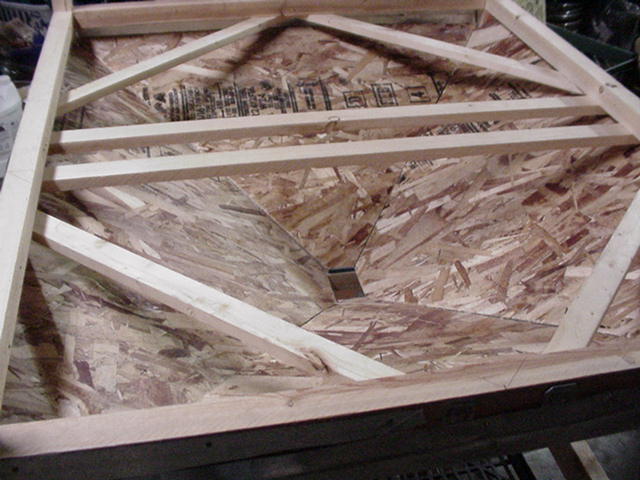
The Return Trough
The trough acts as a funnel for all of the media to return to the bucket in which it came. I considered using sheet metal to keep the weight down, but I would have to put up with the louder noise of the media hitting the tin as it fell. I decided the ten or so pounds I would have saved wasn't worth the extra noise, so I opted for wood instead. Yea I know... I'm picky!
|
Starting to take Shape!
Here I've installed the floor, and have the trough finished. I sealed the trough with flashing and caulking. You could probably get by with out the flashing, but since I had some left over from another project, I figured I'd put it to use. You can barely catch a glimpse of the bread trays I will be using for a shelf.
|
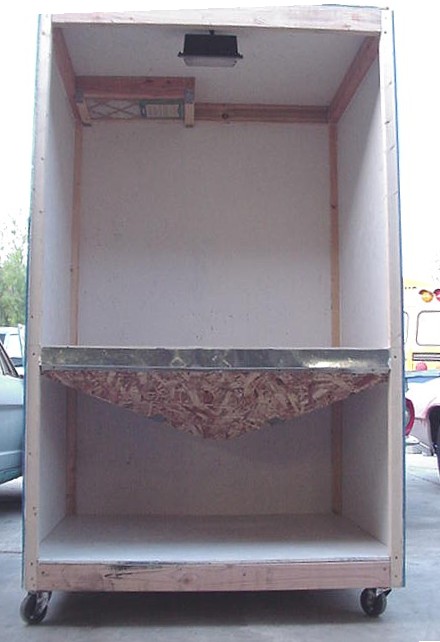
Walls & Ceiling
I painted the interior of the walls & ceiling white to help reflect the light inside the cabinet. Actually, my kids and a couple of their friends wanted to help, so I gave them a brush and some paint and all it cost me was an ice cream when the job was done! Everything was painted before it was assembled.
Once it was together, I installed the light and sealed the rest of the cabinet with caulking so the only place media could escape is down the chute.
|
The final pictures and material list can be found on page two. Please click on the link below to continue.
|
|